
Operation Panel
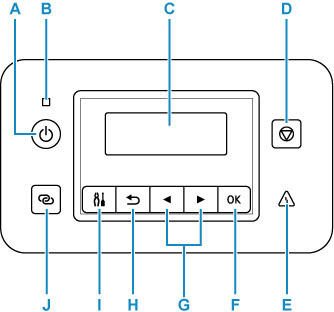
- A: ON button
-
Turns the power on or off.
- B: ON lamp
- Lights after flashing when the power is turned on.
- C: LCD (Liquid Crystal Display)
- Displays messages, menu items, and the operational status.
- D: Stop button
- Cancels operation when printing is in progress or when selecting a menu item.
- E: Alarm lamp
- Lights or flashes when an error occurs.
- F: OK button
- Finalizes your selection of items. Also used to resolve errors.
- G:
 and
and  buttons
 - Used to select a setting item. These buttons are also used for entering characters.
- H: Back button
- Returns the LCD to the previous screen.
- I: Setup button
- Displays the Setup menu screen. With this menu, you can perform printer maintenance and change printer settings. Also used for selecting the input mode.
- J: Wireless connect button
- To set wireless router information in the printer directly from a smartphone or other such device (without having to do any procedures at the router), hold down this button.
